Communication Tools - Admin
Keeping participants informed is one of the most effective ways to drive engagement. Admins who send regular communications throughout a challenge consistently see higher participation and retention. Be Well gives you three ways to reach your participants,emails, on-platform notices, and questions—all managed from one place in the Admin Panel > Communications. This article walks through each tool and when to use it.
Before you start
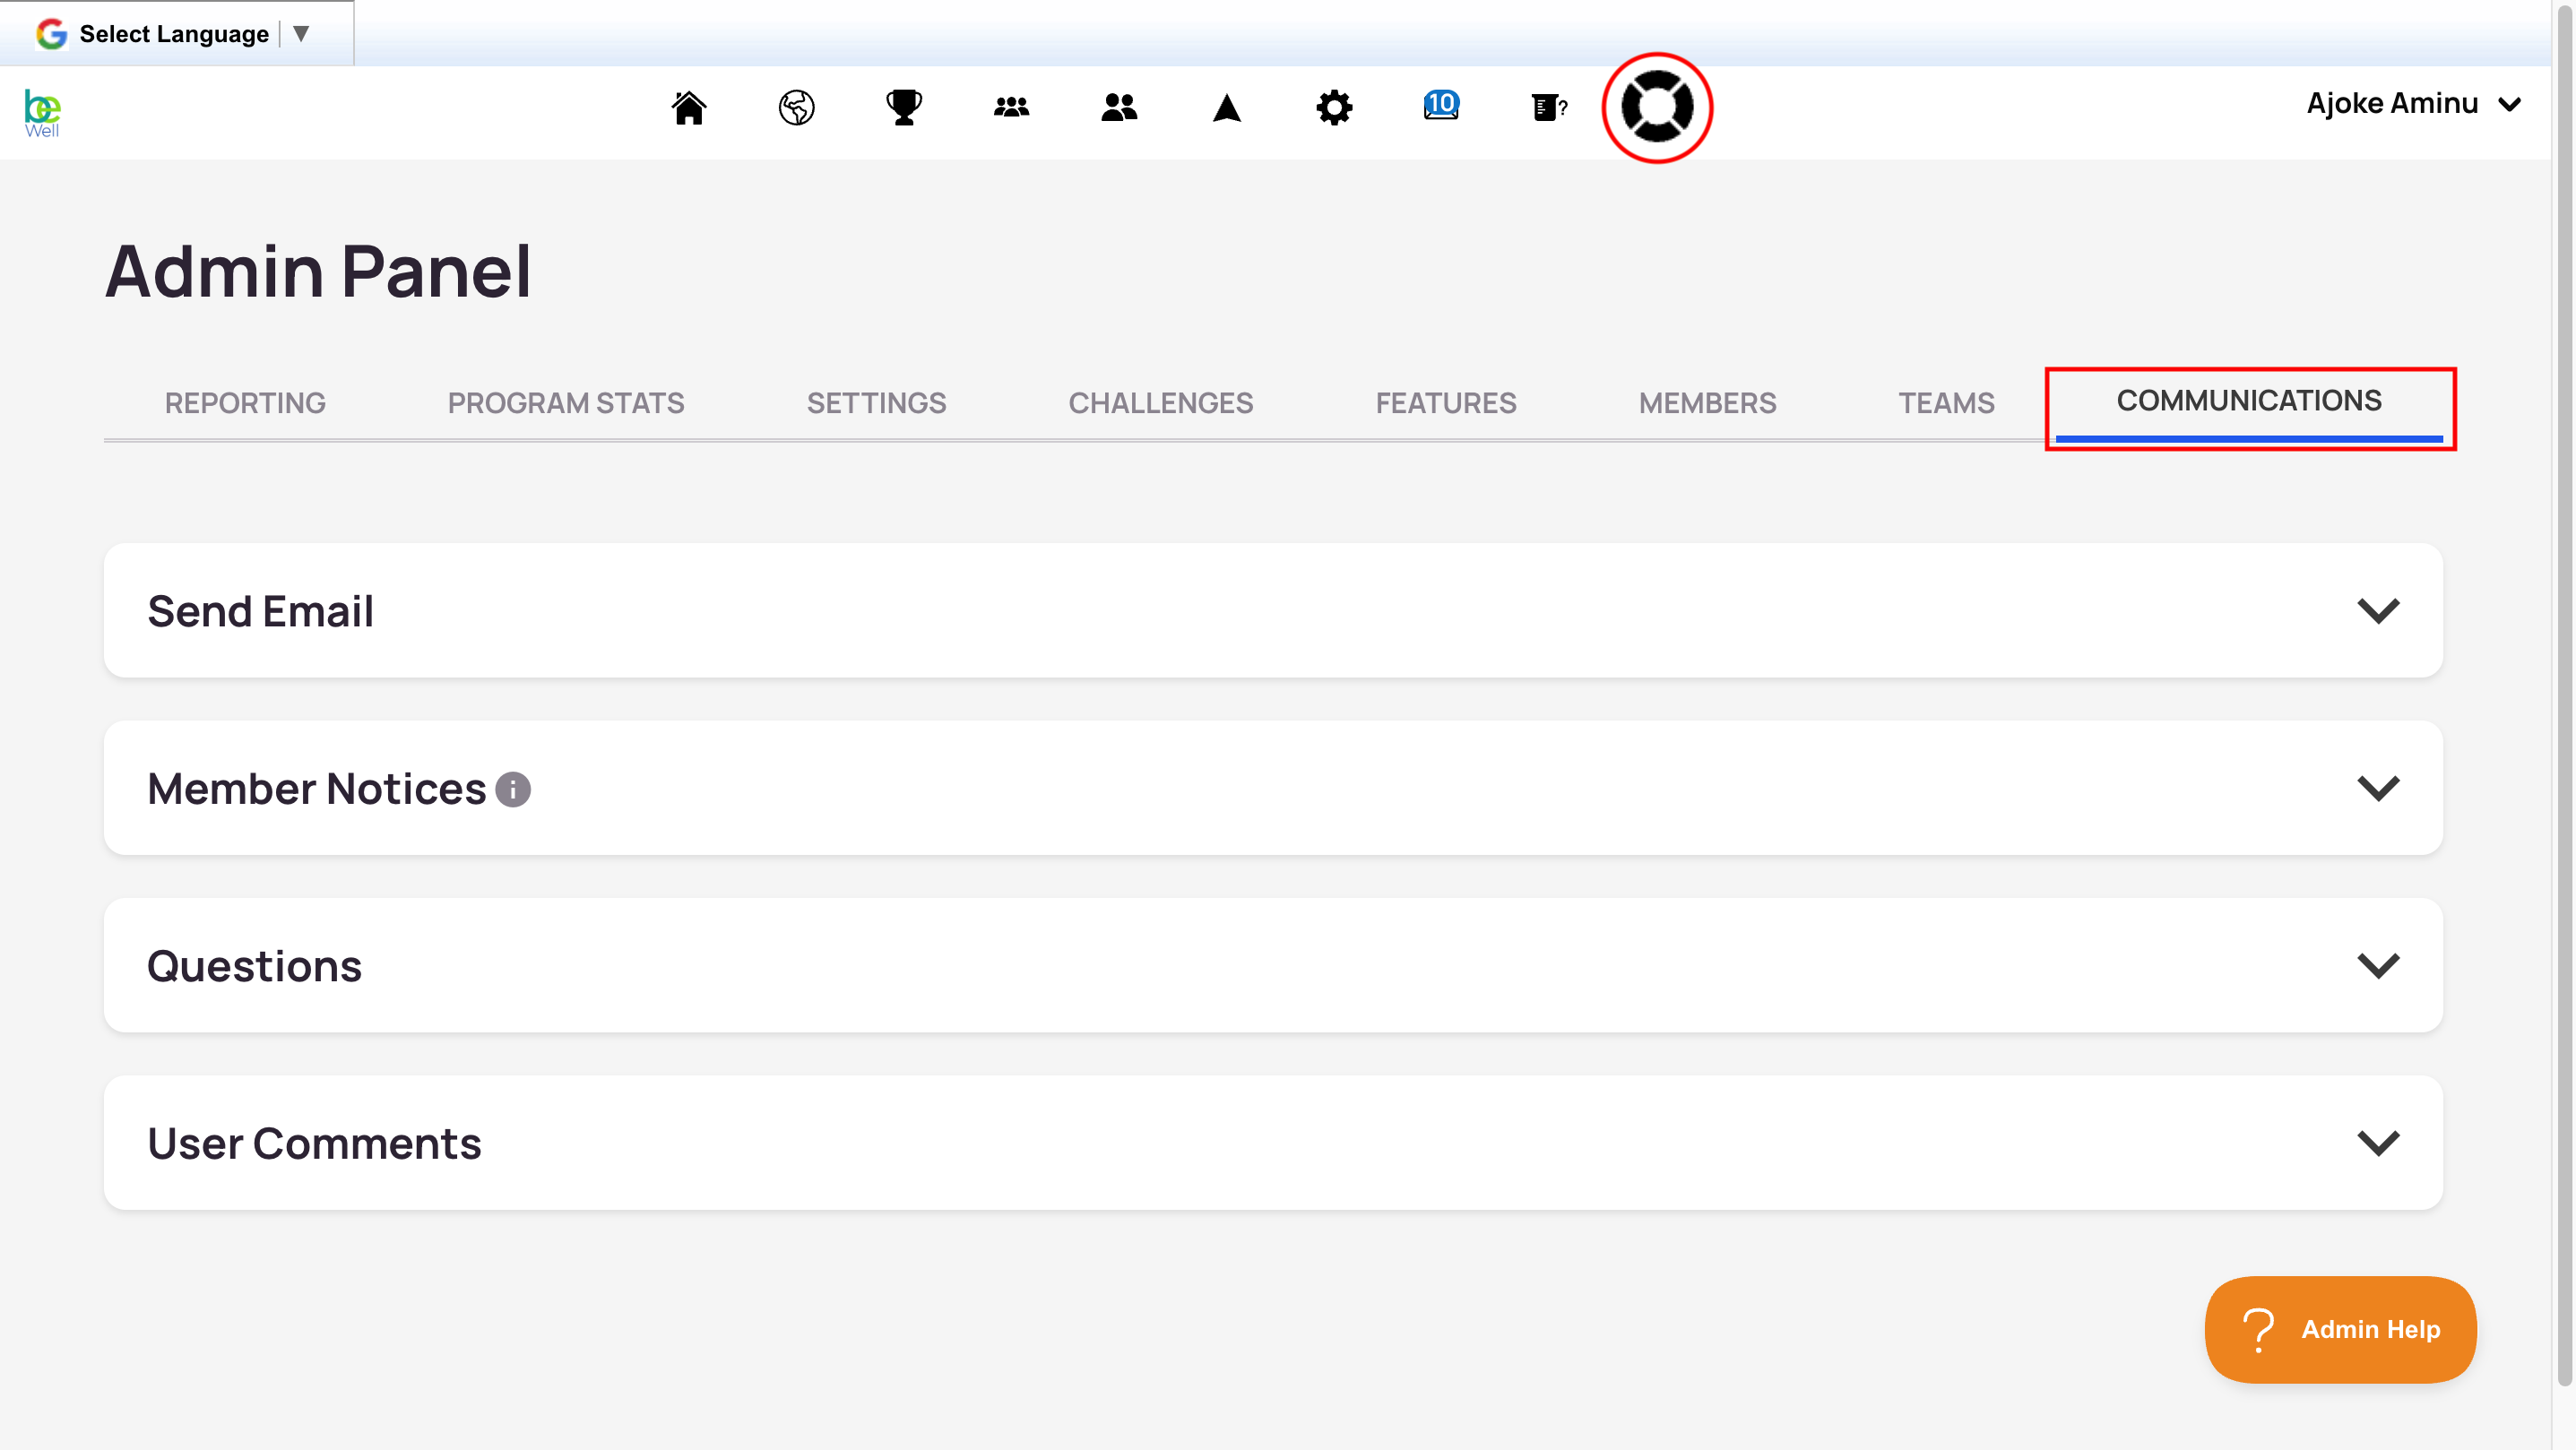
All three communication tools live in the same place. Navigate to Admin Panel > Communications, then choose the tool you need: Send Email, Member Notices, or Questions.
You can send yourself a test email or preview a notice before it reaches participants, so it's good practice to check the format and appearance of any communication before sending it out.
Emailing Participants
Use the email tool to contact participants directly in their inbox. Go to Admin Panel > Communications > Send Email.
Emails will not be delivered to participants who have unsubscribed from program emails.
You can email your entire program or choose specific groups to target.
To email a specific group of participants:
- Download a report to identify the group you want to email. Go to Admin Panel > Reporting, select a report, and click Download. In the exported Excel sheet, select and copy the email addresses of the participants you want to reach.
- Go to Admin Panel > Communications > Send Email > Add Members Individually, then paste the copied email addresses into the field beneath Use CSV.
[Image placeholder — "Add Members Individually" / paste-CSV field]
- Draft your email text in a separate document first, then copy it into the email tool. If you run into formatting issues, clear the formatting in your original document, paste it in again, and use the email editor tools to finalize the draft.
- Enter a subject line, then either Send the email or send a test email to yourself first.
Posting Notices
Notices differ from emails in that they stay inside the program — participants see them when they log in, rather than in their inbox. Use notices for reminders and updates you want visible on the platform itself.
On a desktop browser, notices appear in a grey box at the top of the participant's dashboard and remain visible for the date range you set.
To create a notice:
- Navigate to Admin Panel > Communications > Member Notices > Create New.
- Enter the text, image, or hyperlink you'd like to share. Click Preview Notice at the bottom to confirm your message looks correct.
- Set a start date and end date to control when the notice appears and disappears.
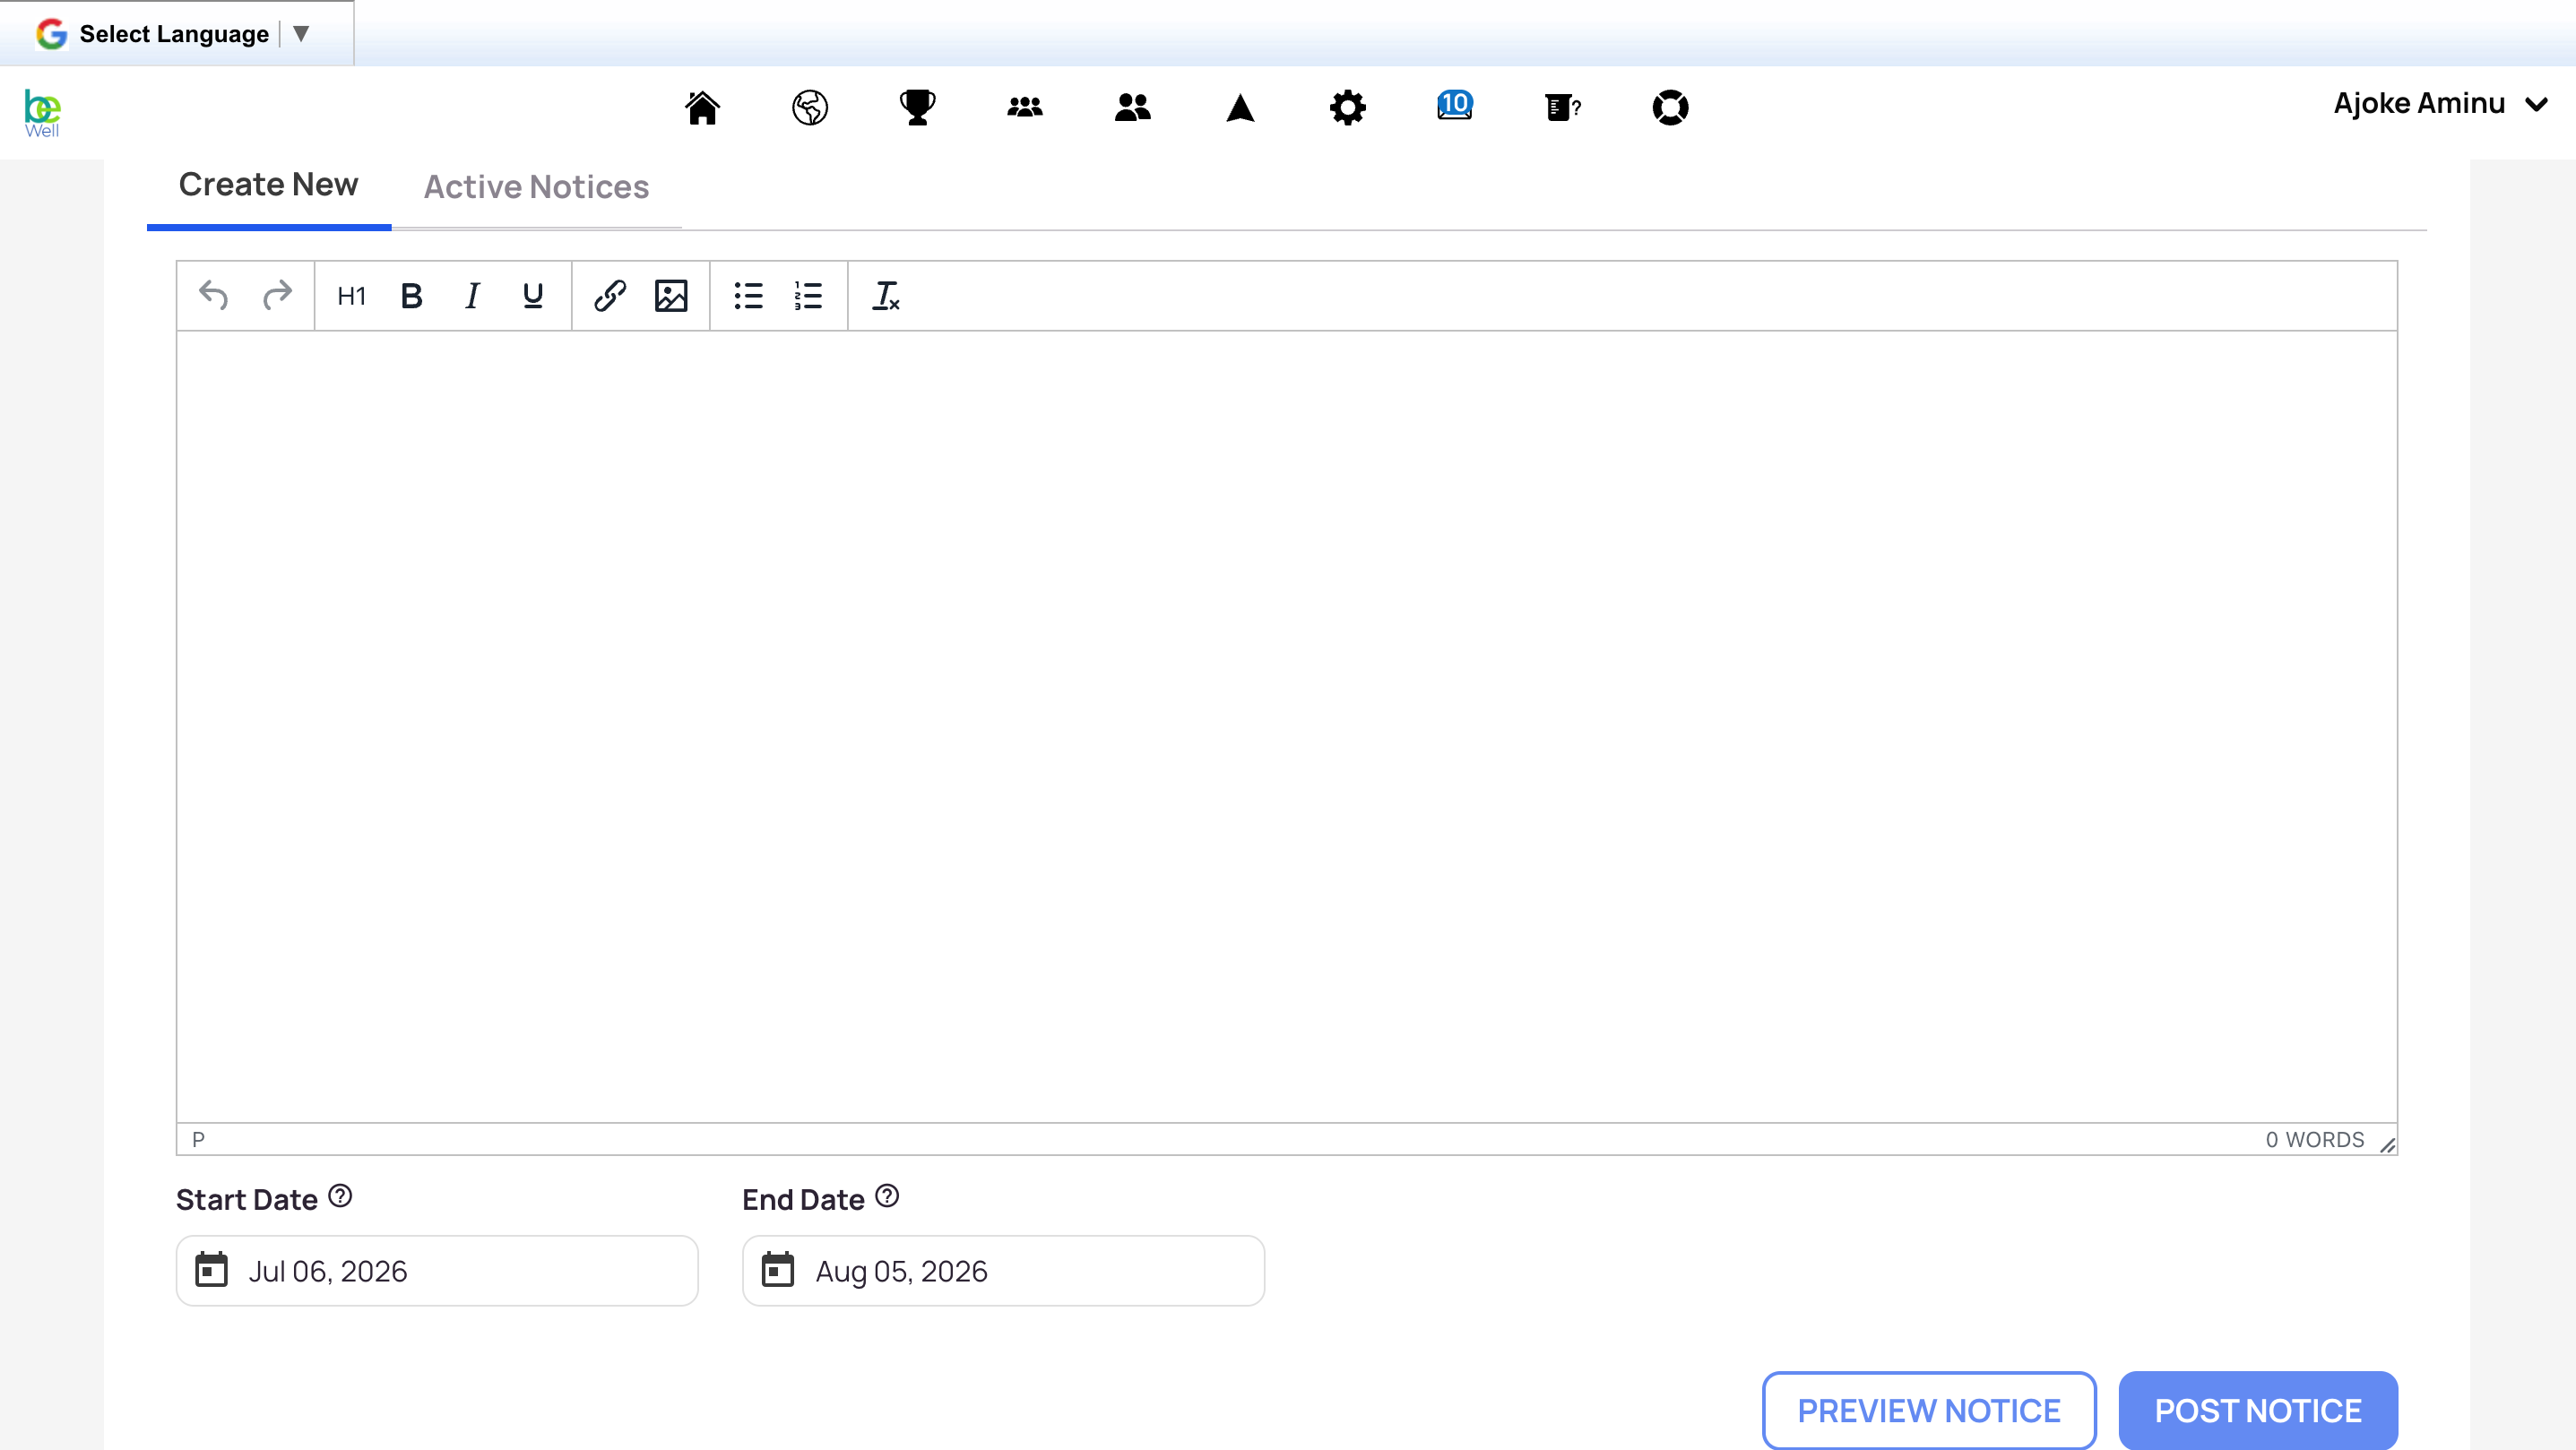
Participants can dismiss a notice for themselves using the X in the top right after they've seen it. You can schedule multiple notices at once, including notices for future dates.
Posting Questions
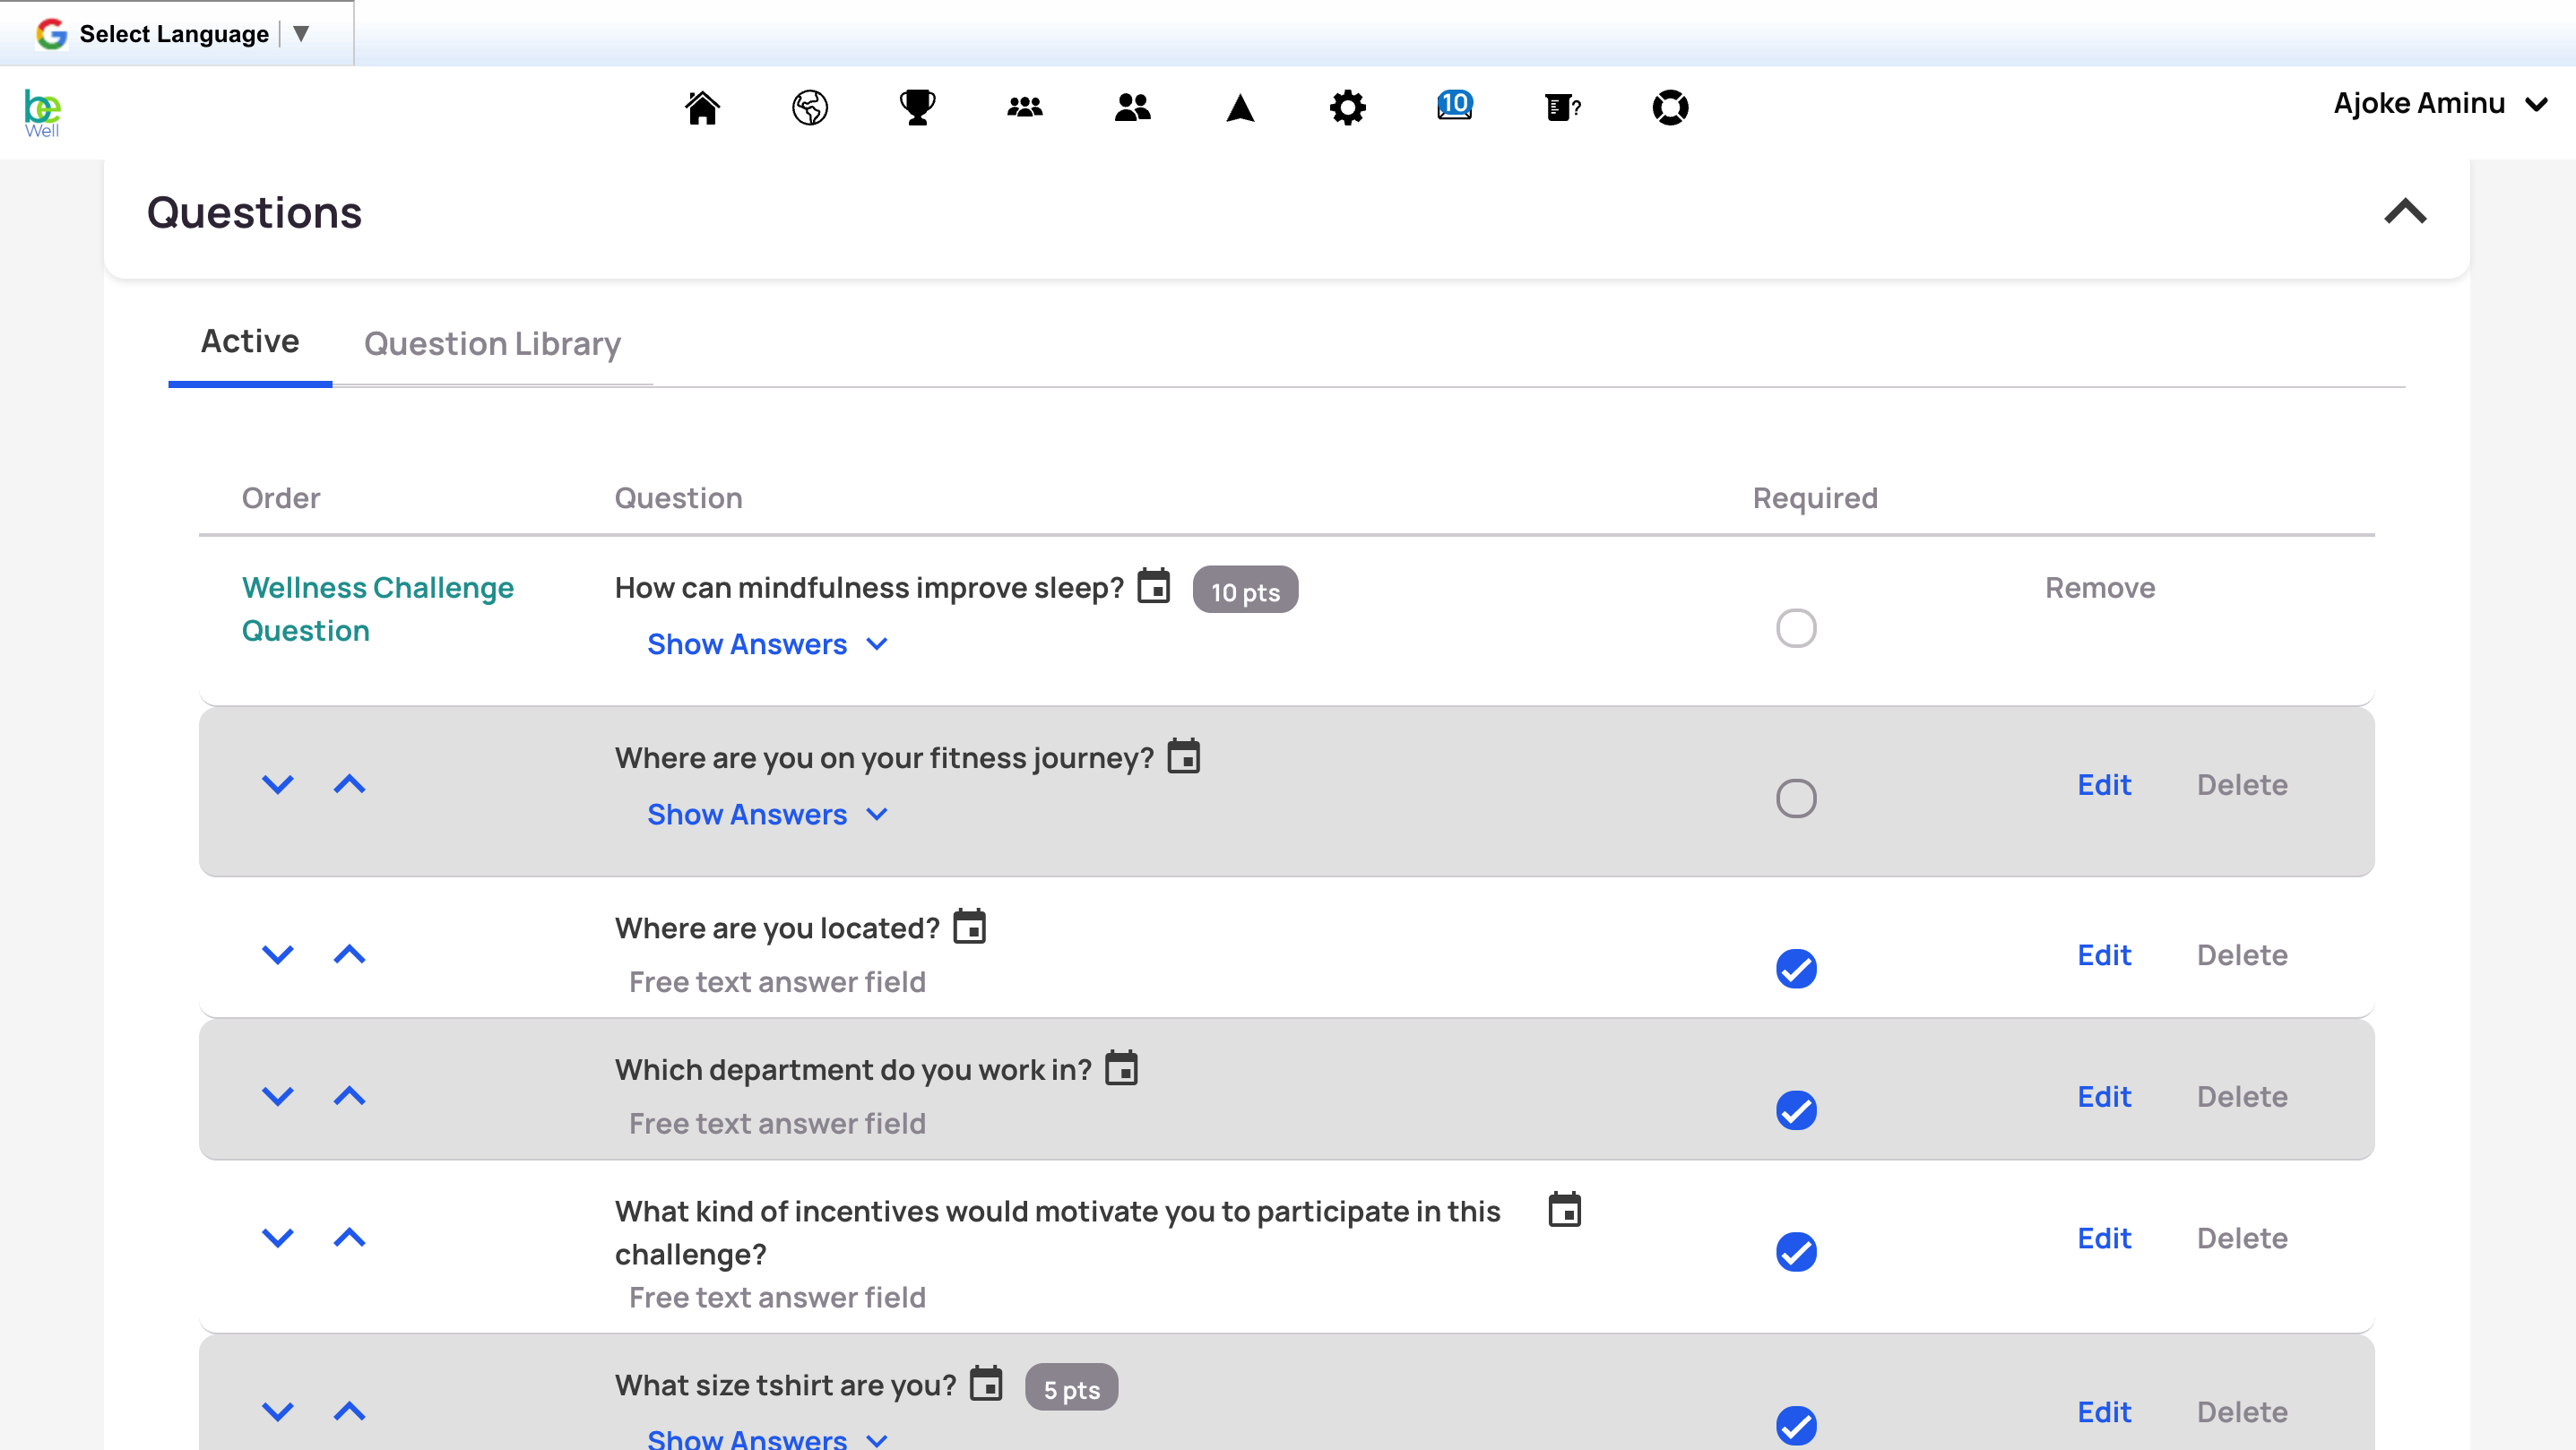
The Questions tool lets you pose questions to participants at any time, or as part of registration. Use it to gather information such as department, shirt size, or wellness preferences. Navigate to Admin Panel > Communications, then scroll to Questions.
The Questions view has two areas: Active questions (currently in your program) and the Question Library (pre-made questions covering common scenarios). For Active questions, you can toggle a question as Required, or choose to Edit or Delete it from the main screen. Questions appear to participants in the order shown here; reorder them using the arrows to the left of each question.
Creating or editing a question
When creating or editing a question, you'll set its parameters and define the available answers:
- Question Type determines which answer formats are available. A Text Field question has no preset options.
- Question Text is the heading and primary text participants see.
- Description / Text is an optional field for a longer explanation, shown beneath the question when it's accessed directly.
- Answer Options sets the choices available, depending on question type. To add answers, start a new line and enter
##before each answer.
You can set a date range for the question to stay active, or leave the end date blank to keep it open indefinitely. Mark a question as Required to prevent participants from proceeding without answering, or enable Show at registration? to include it in account creation.
On certain subscriptions, you can enable Earn XP for answering the question, letting participants accumulate points. Set a point amount, then optionally select Only earn XP if the correct answer is provided.
These XP points are not added to any challenge. Refer to the Questions report to see how many points a participant received, albeit these points are not included in challenge reporting or challenge totals.
Note: Once a participant answers a question, that answer is saved and cannot be changed. If an answer needs correcting; for example, a department change or an incorrect shirt size, you'll need to update it in your own records.
Using the Question Library
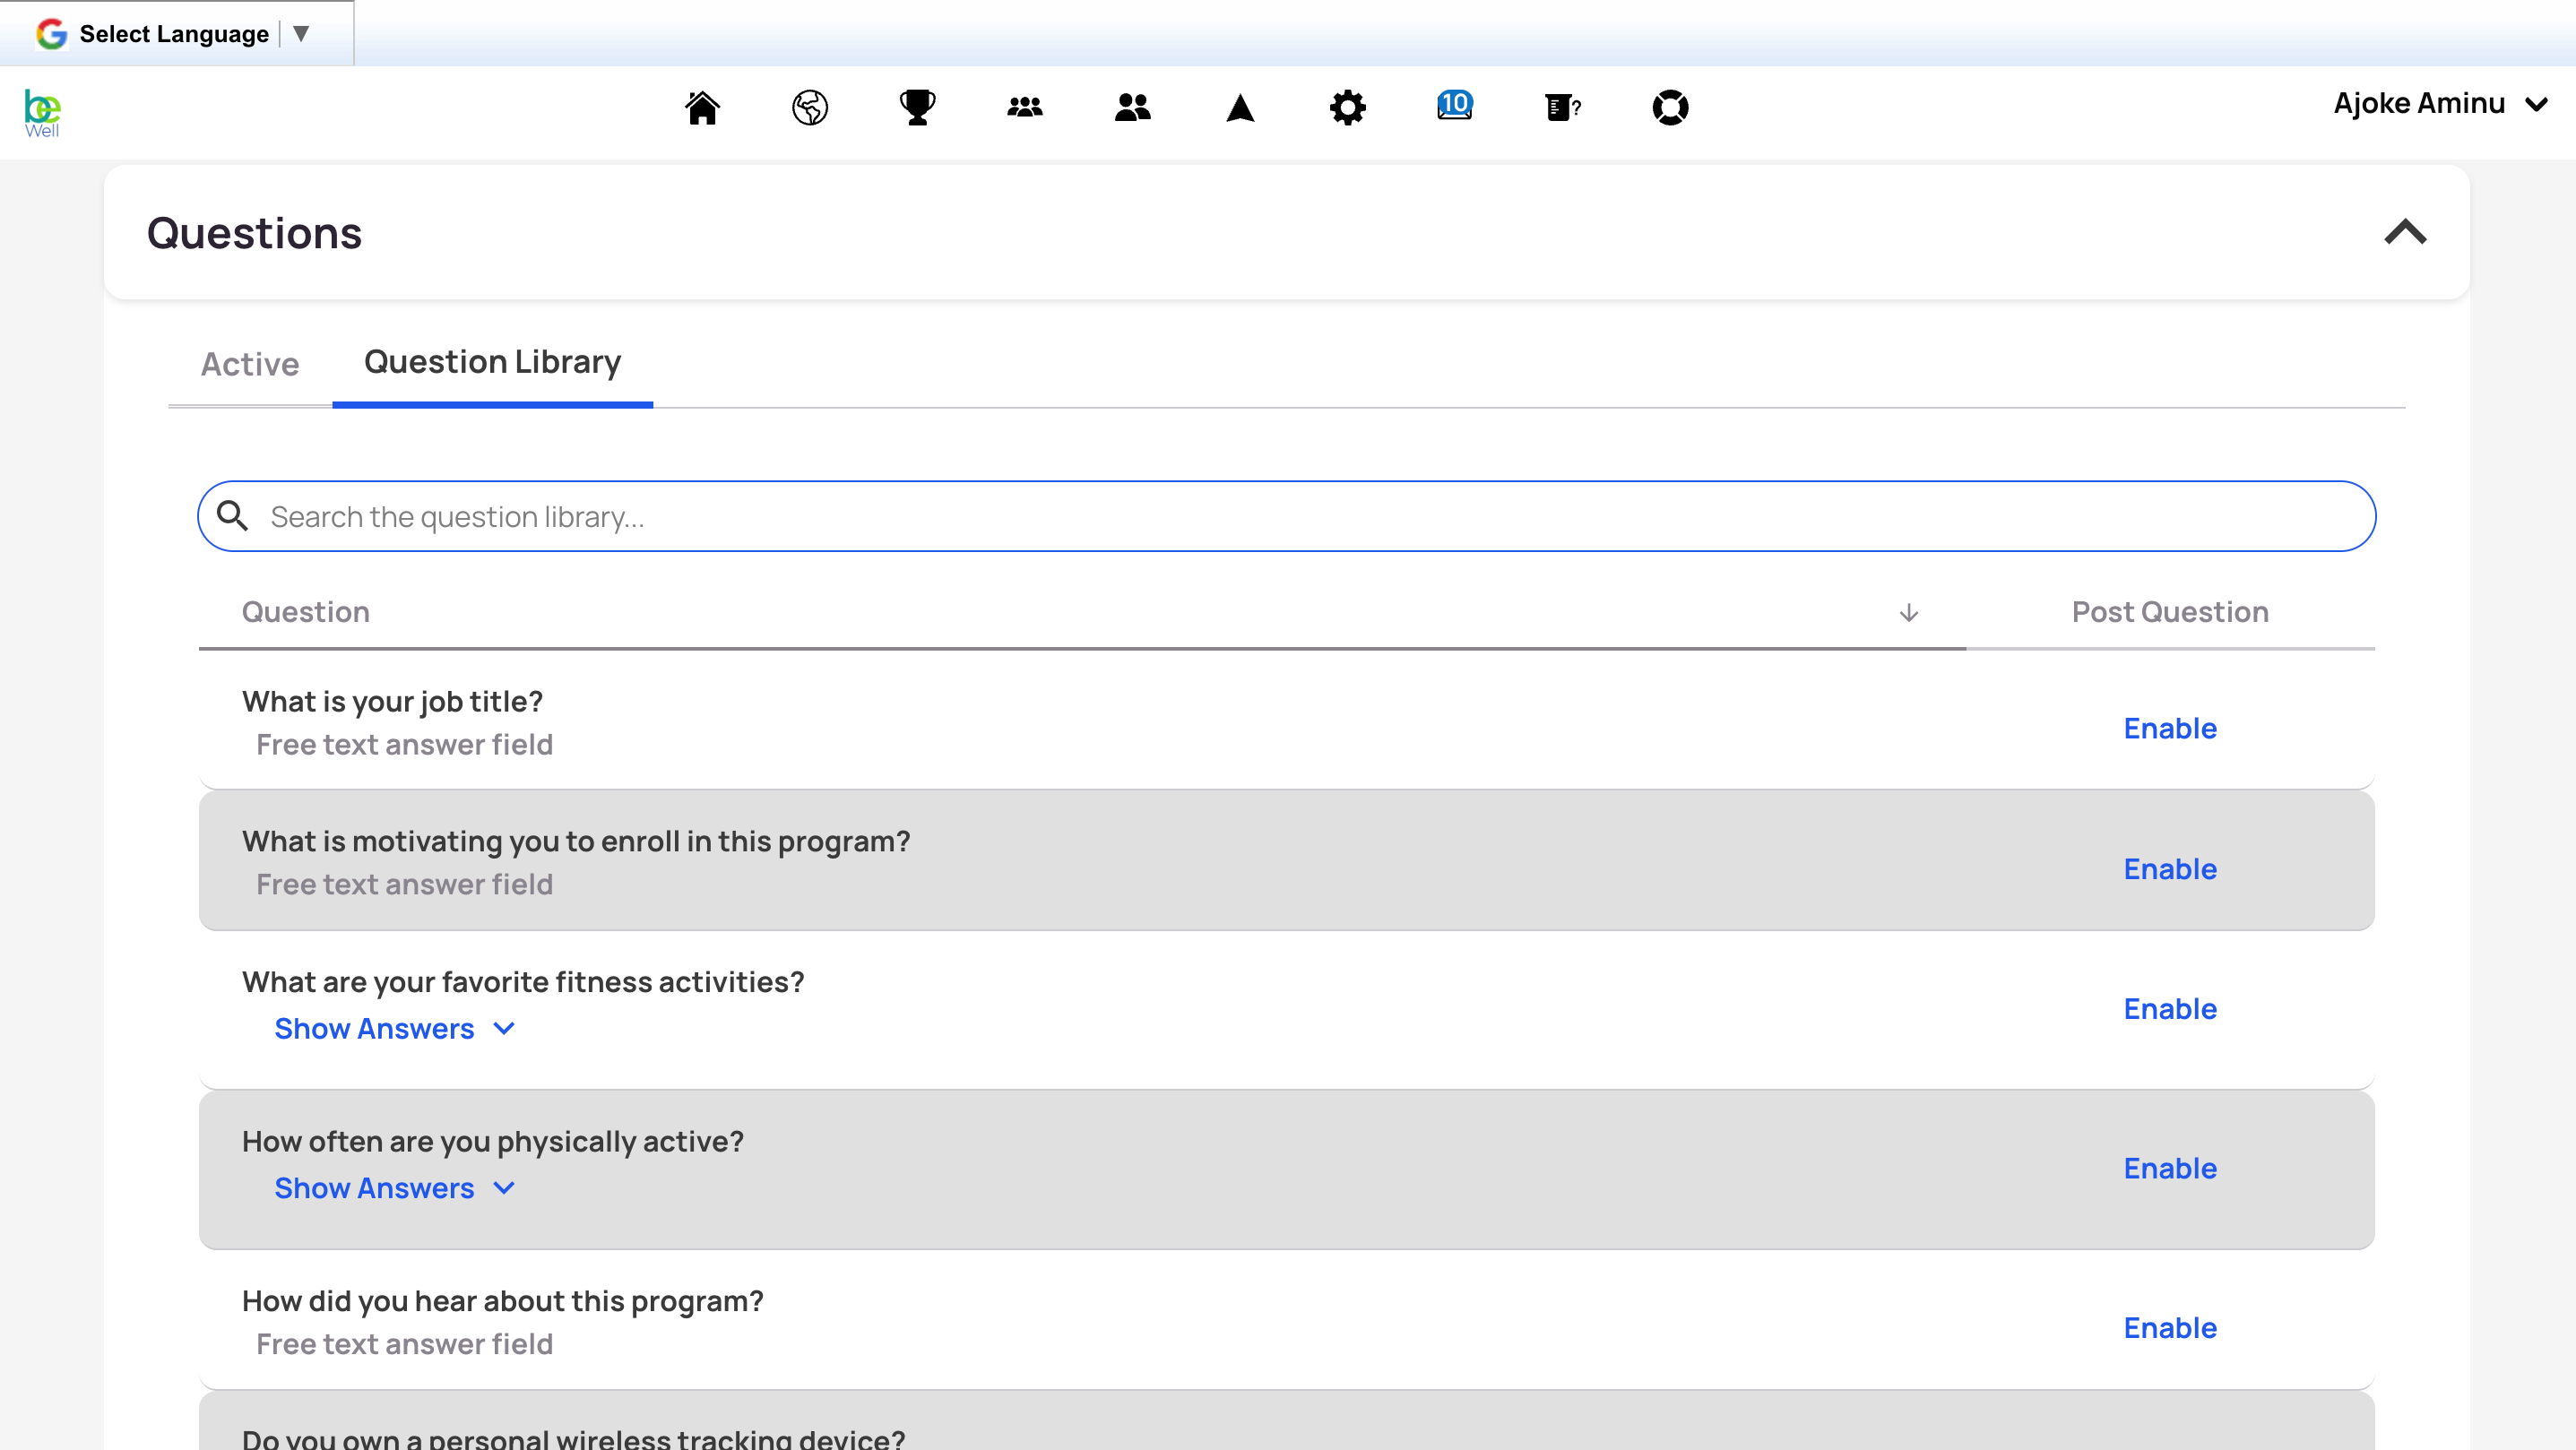
The Question Library offers pre-made, pre-formatted questions covering situations applicable to most programs. Navigate to Admin Panel > Communications > Questions > Question Library, find a question you'd like to use, and click Enable to activate it.
Note: Library questions can't be edited directly. To customize one, create a new question using the library version as a starting point.
Related
Marketing collateral for movement challenges, including a digital poster and email templates, is available under Admin Panel > Challenges. Locate your challenge and use the download symbol in the Collateral column. (Covered in full in the Challenge Management article.)